

Agentic Development in Microsoft Fabric, Part 1: The Setup
Preview notice, verified August 2026. The Fabric Core MCP Server is in public preview. Endpoints, tool names and configuration can change before GA, so if a command here doesn’t behave the way I describe, check the Microsoft Learn docs before assuming your setup is broken. I date-stamp every post in this series and update them when things move.
Everyone is trying to get more out of their day with AI right now. Your team, your clients, probably you as well. And AI genuinely helps, but only when it’s set up properly, with real tools, MCPs and skills behind it. Sitting in a chat window pasting questions won’t get you anywhere near what AI Native tools can do.
I’ve had a few chances lately to work through this with our clients, testing different approaches to agentic development workflows, especially for Microsoft Fabric. So I’m starting a short series on it. What to use, how to wire it together, and how to empower yourself and your team to actually get the performance out of it.
Because you don’t buy a Ferrari to drive to the grocery store 🙂 Use your tools right and you get the value out of them.
This first post is the setup. What to install, what each piece does, how it all connects.
My stack: Claude Code as the AI, so everything below is shown with Anthropic’s tooling. You can do the same with GitHub Copilot, Codex or whatever you prefer, the pieces are the same. For the IDE side of Fabric and Power BI work I use Visual Studio Code with a set of MCPs and extensions. More on those in a minute.
Before you start
A few things worth having in place first, so you don’t get blocked halfway through:
- Node.js 20 or newer, with npm. Claude Code itself doesn’t need it, the installer ships its own runtime, but one of the MCP servers below runs through
npx, and the Fabric Apps tooling later in this series needs it too. Get it from nodejs.org and confirm withnode --version. - Git. Claude Code reads commit history for context, and everything we build later lives in a repo anyway.
- A Claude plan that includes Claude Code – Pro, Max, Team, Enterprise or a Console account billed per token. The free plan doesn’t include it.
- Fabric access with at least Viewer on one workspace, on a work or school Entra account. Personal accounts won’t work.
First, the base tools
Start with Visual Studio Code – grab it here and install it the normal way. Nothing special.
Then the important part: the AI itself. That’s the brain and heart of the whole agentic flow. I’ll be using the VS Code extension and the terminal for Claude Code. There’s a desktop app too, available here, but I find it less efficient, you can’t really multitask in the app while you’re developing.
The VS Code extension
Open VS Code, go to Settings → Extensions, search for Claude Code for Visual Studio Code, install it:
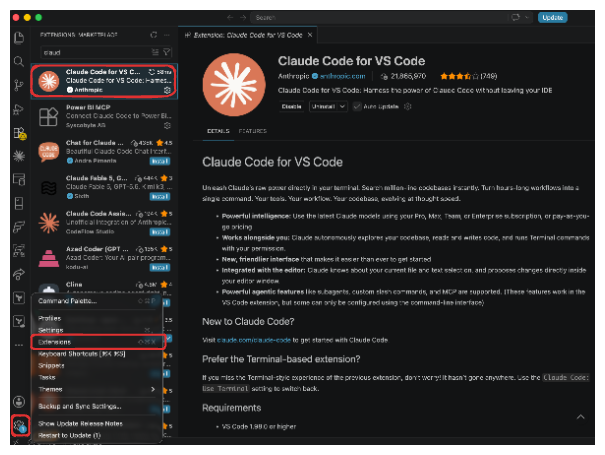
You’ll get a Claude icon in the left bar. Click it, click “new session”, and you’ll be asked to log in with your license:
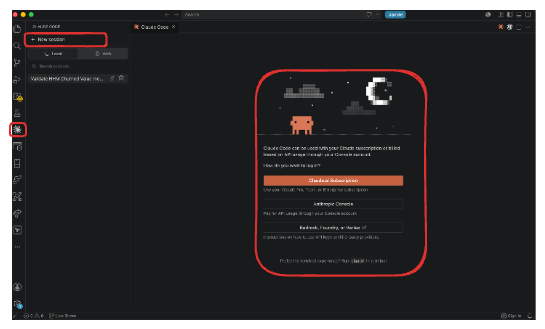
Pick your license, authorize, done.
Claude Code in the terminal
This is the one I actually use day to day. The VS Code extension gets laggy sometimes.
Open Terminal on Mac or Linux, or CMD or PowerShell on Windows, then run the command for your platform.
macOS / Linux
curl -fsSL https://claude.ai/install.sh | bash
Windows – PowerShell
irm https://claude.ai/install.ps1 | iex
Windows – CMD
curl -fsSL https://claude.ai/install.cmd -o install.cmd && install.cmd && del install.cmd
You should see this:
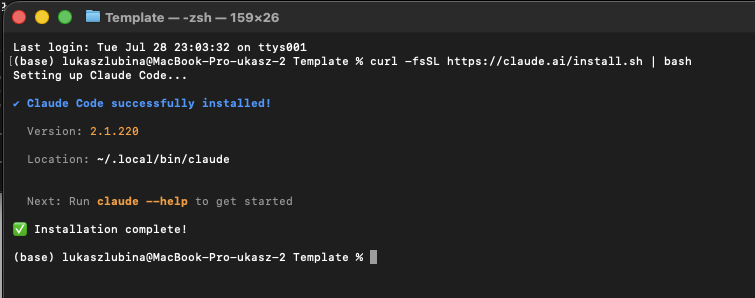
To confirm it landed correctly, run claude --version:

Installing MCPs and extensions
One warning before you install anything
Search npm for “fabric mcp” or “power bi mcp” and you’ll find a dozen community packages. Some are fine. Several ask you to create an Azure App Registration and hand them broad Power BI scopes like Dataset.Read.All and Workspace.Read.All. Don’t. Everything in this post is published by Microsoft, check that the package scope is @microsoft/ or that the endpoint sits on a microsoft.com domain, and skip it if it isn’t.
This matters because of how the official servers handle identity. The remote Fabric server doesn’t get its own credentials: every request goes through Entra ID, the agent operates as you, and it can’t exceed the permissions you already have. Every action lands in the Fabric Audit Logs like any other operation. So it can’t reach anything you can’t reach yourself.
That’s the difference between a setup you can put in front of a client’s security team and one you can’t. If you work in healthcare, pharma or financial services, this is the part you’ll be asked about.
Fabric Data Engineering extension
Now for the Fabric side, the extension that connects you to notebooks, Power BI and the rest.
Back to Settings → Extensions, search for “Fabric Data Engineering”. You’ll see more than one result, and honestly it’s not clear on first glance which one to use. The one ending in “Remote” only lets you edit and display notebooks online, inside Fabric. Sounds convenient, and you do get to work directly there, but the files never land on your machine, which means your AI can’t see them. That’s the whole problem. Pick the one highlighted below:
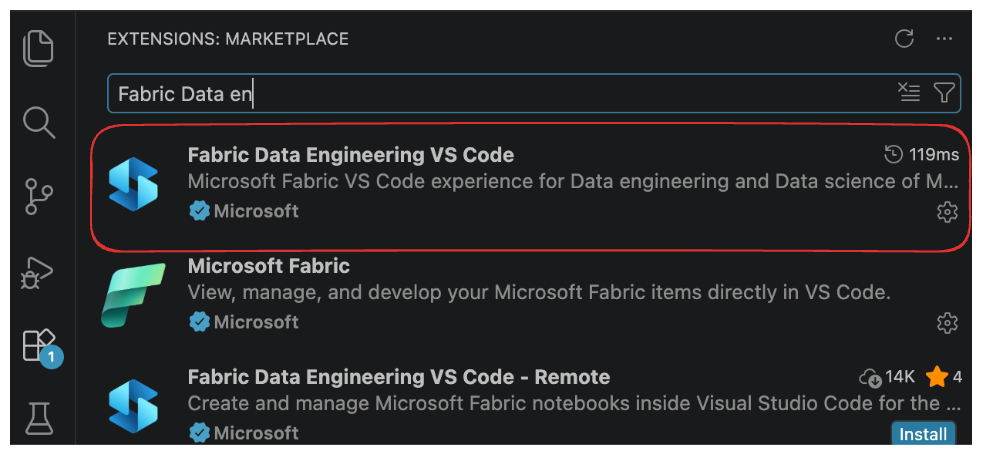
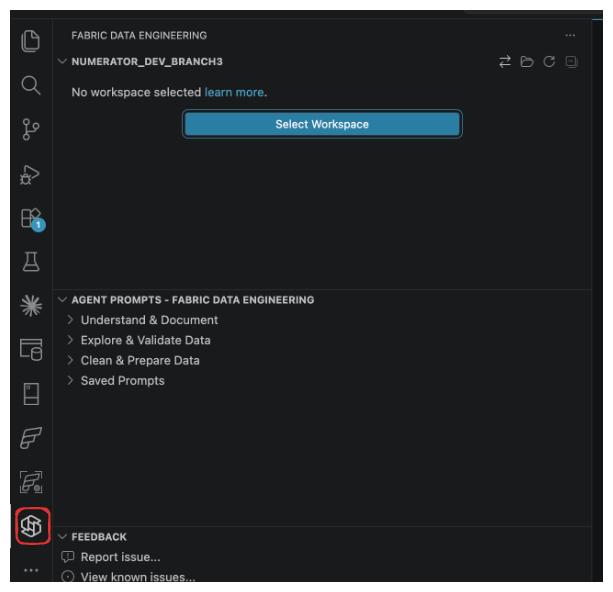
Once it’s installed, open it from the left pane and sign in. If you don’t get prompted, use the select workspace option. Then you’re all set:
Power BI MCP
Next up are the MCP servers Microsoft publishes. Two of them matter here. The Power BI one connects your agent to a Semantic Model so it can edit it. The other one manages your tenant – listing, editing and creating workspaces, handling role assignments, that kind of thing.
Power BI first, since it installs from the extensions pane like the previous one. Search for Power BI MCP and install it. No authorization needed at this stage:
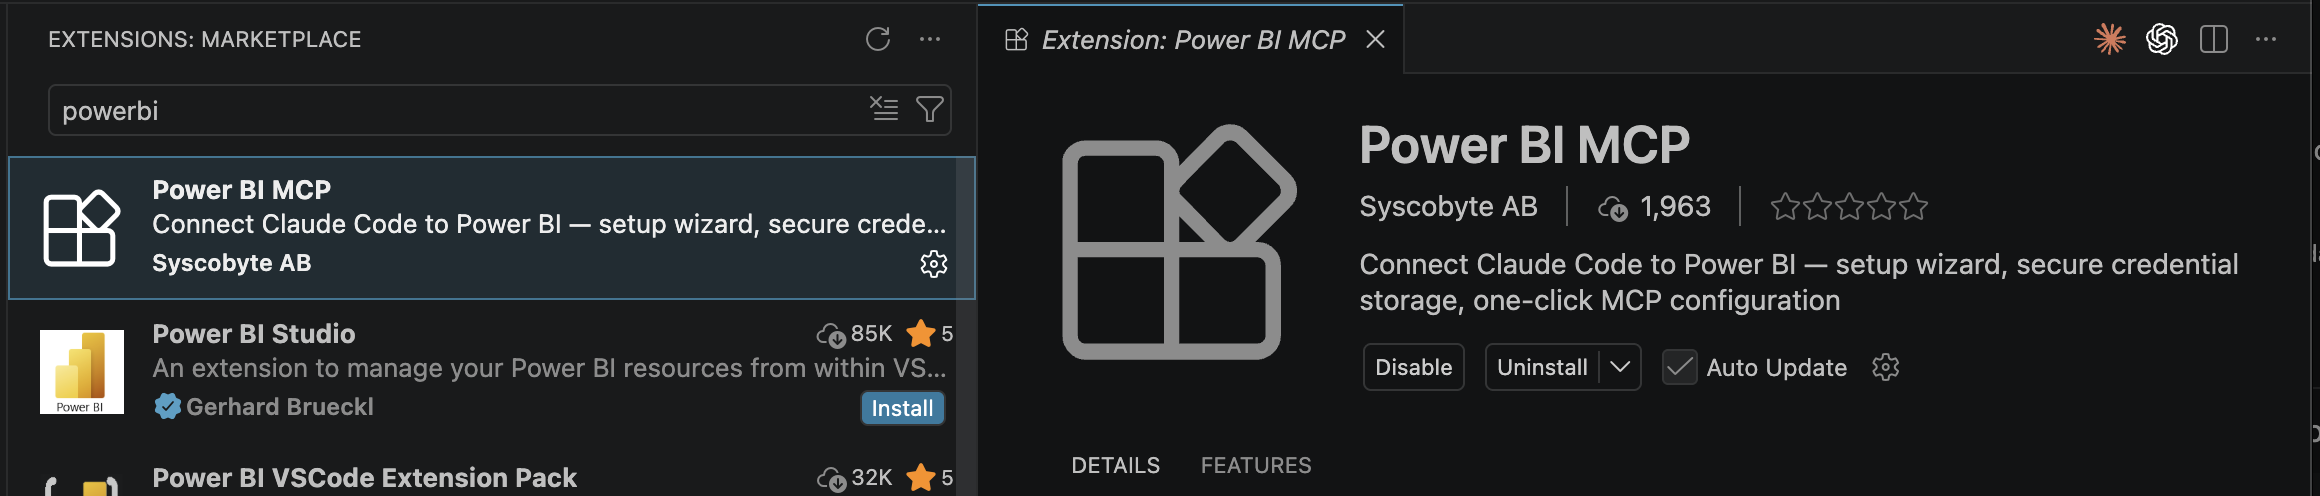
If you’re on GitHub Copilot, that’s all you need in VS Code. Different AI, like me? Then you need a different route. On Mac or Windows, open the terminal and run this (it doesn’t even need the VS Code install above):
claude mcp add powerbi-modeling-mcp -s user -- npx -y @microsoft/powerbi-modeling-mcp@latest --start

After that there’s nothing else to do – it gets written into your .claude.json automatically. You can check the configuration here:
- macOS:
/Users/<your_username>/.claude.json - Windows:
C:\Users\<your_username>\.claude.json
(the terminal prints the location too, right after installation), and you should see this:
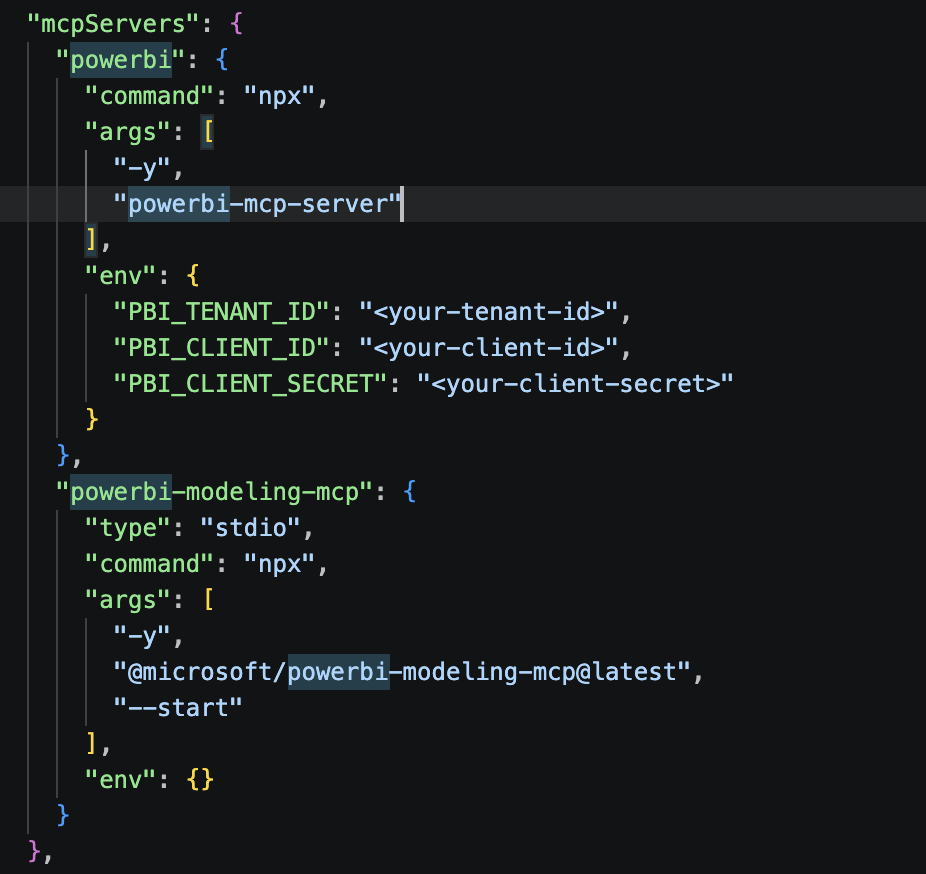
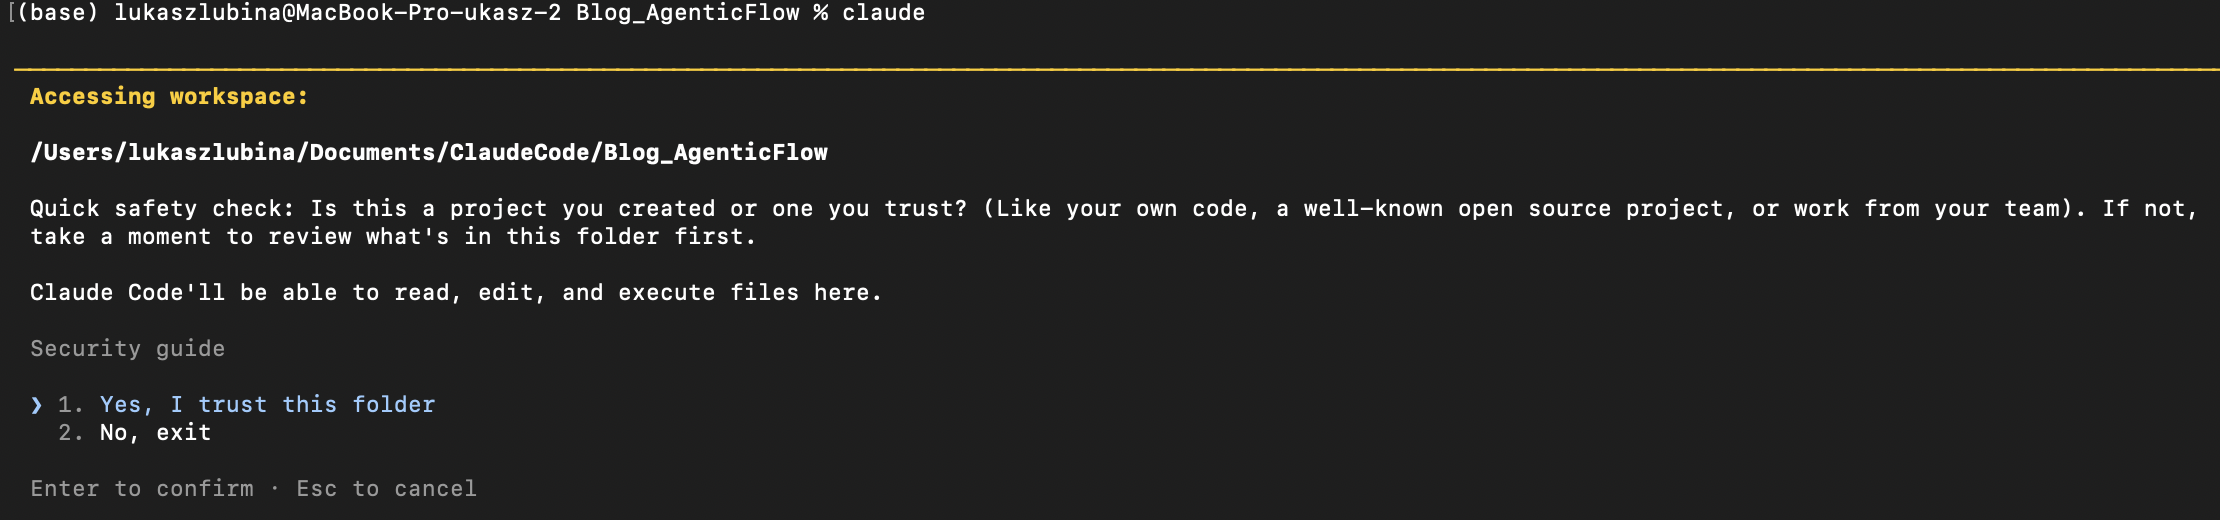
Worth verifying it’s actually visible to Claude. Open the folder you want to run Claude in first – I’d suggest a dedicated subfolder created just for this, so it doesn’t get more permission than it needs. Then type claude in the console and select “Yes, I trust this folder”:
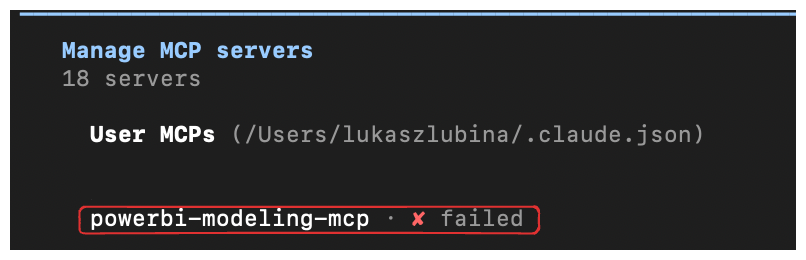
Type /mcp, hit enter, and it should show up in the list:
One note on that folder. Trusting it gives the agent read and write access to everything underneath, plus the ability to run commands there, which is why I don’t launch it in my home directory or at the root of a repo full of client data. A dedicated subfolder keeps the blast radius small. Claude asks before anything destructive, and at some point you’ll be tempted to silence that with --dangerously-skip-permissions. Don’t. Or if you really have to, do it in a throwaway folder with nothing in it you’d miss
Fabric MCP
Different mechanism this time. The Fabric MCP is a remote server Microsoft hosts, so there’s nothing to install – you just point Claude at the endpoint. Terminal on Mac, CMD on Windows:
claude mcp add --transport http fabric https://api.fabric.microsoft.com/v1/mcp/core --scope user
You’ll get this back:

Check .claude.json again to make sure it got added properly:

Then the same validation as before – start claude, type /mcp:
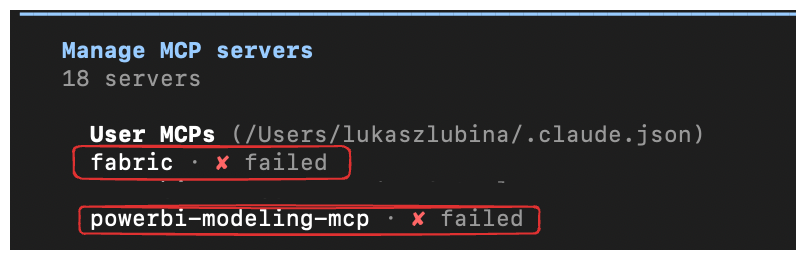
Access configuration I’ll cover in one of the next posts, when we get to where and how to actually use these.
Skills for Microsoft Fabric
Last piece, and definitely not the least – the skills Microsoft created and shared. They make development easier, more tuned to the Fabric environment, and the code that comes out is simply better written.
So what is a skill? Nothing more than instructions for the AI on how to code, how to build notebooks, how to write measures. A markdown file with a long prompt telling the AI what to do. That’s it. What you get out of it is that you stop pasting the same prompt again and again to keep the code structured and useful.
One thing that makes this better than a giant pasted prompt: skills don’t all load at once. The agent reads each skill’s short description and only pulls in the full instructions when the task actually matches. You can install a hundred of them without drowning your context window.
Without them you get code that looks plausible but calls the wrong endpoint, misses authentication, or lays out an architecture that doesn’t match how Fabric items really work, and you spend your time correcting the AI instead of moving faster with it.
Microsoft publishes them here: Skills for Fabric. You can download the repo and drop it in your claude folder yourself, but there’s a simpler way:
- Add the Microsoft marketplace (this one has to be run from Claude Code):
/plugin marketplace add microsoft/skills-for-fabricThe result should look like this:

- Install the Power BI skills:
/plugin install powerbi-authoring@fabric-collectionHere’s what a successful install looks like:

Type/powerbi-authoringand all the skills show up:
Before you get to the Fabric side, one thing worth knowing: you don’t have to take the whole bundle. There are focused ones:
/plugin install fabric-authoring@fabric-collection    # building things
/plugin install fabric-consumption@fabric-collection  # querying things
/plugin install fabric-operations@fabric-collection   # admin / capacity
Or filter the scope yourself:
/plugin install fabric-skills@fabric-collection --filter "spark-*"
- If you want everything, install the full Fabric bundle:
/plugin install fabric-skills@fabric-collectionAfter installation you should see this:

To confirm it worked, type /fabric-skills and check that the skills are listed:

One more command worth knowing: /fabric-skills:check-updates tells you whether your bundle is behind the repo. That check runs automatically at most once every seven days, so if you’ve been on the same version a while it’s worth running by hand.
Wrap-up
That’s the setup. Four sets of tools, each doing a different job: the LLM itself, the Fabric extensions for the live connection, the MCPs so Claude can reach Fabric and Power BI, and the skills bundle so it understands how development actually works in this environment.
Quick recap:
- VS Code + Claude Code – the base
- Fabric Data Engineering extension – keeps files local, where the AI can see them
- Power BI and Fabric MCPs – the connection to your tenant
- Skills – Fabric-aware instructions, so you stop re-explaining yourself
These two get mixed up a lot, so to be clear: the MCPs connect Claude to Fabric, the skills tell it how Fabric actually works. You want both. MCPs on their own give you an agent that can reach your tenant and still write nonsense into it.
Where this series goes next:
- Setup – you’re reading it
- Data Engineering – notebooks, pipelines, medallion work
- Power BI development – semantic models, DAX, report work
- Fabric Apps with Rayfin – provisioning a full app backend from code
In the next posts I’ll put all of it to work and show what this looks like in practice.