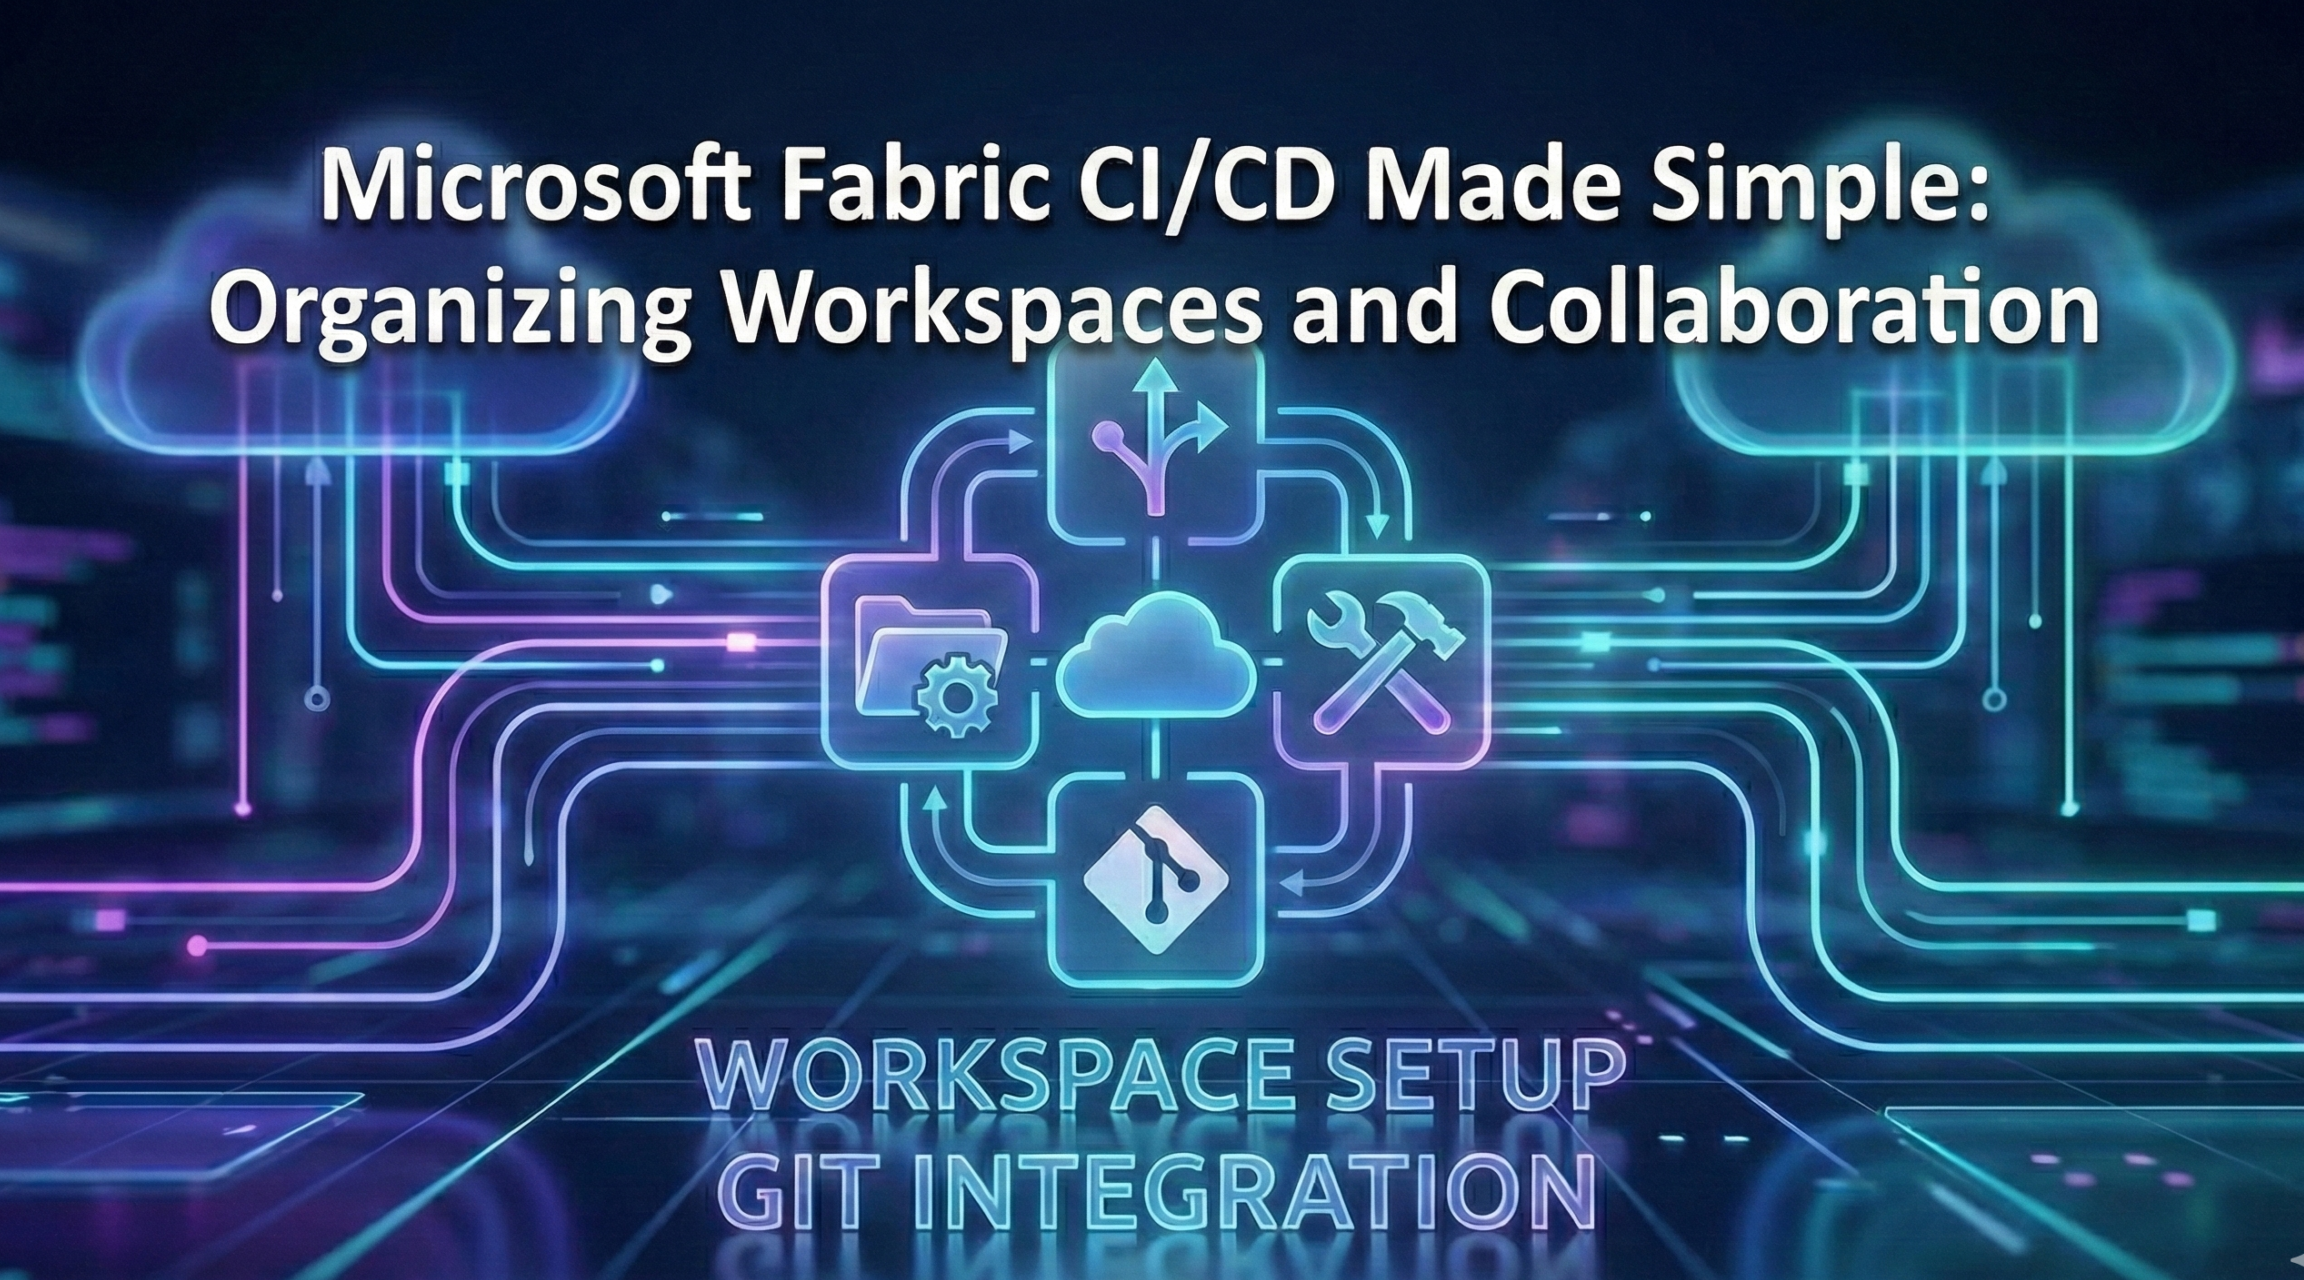
Microsoft Fabric CI/CD Made Simple: Organizing Workspaces and Collaboration
If you’ve ever worked on building or releasing data solutions, you’ve probably run into the usual suspects: long release cycles, last-minute bugs, and the classic “it works on my machine” problem. Writing clean code is only half the job—getting it into production reliably and quickly is where things tend to break down.
That’s where CI/CD (Continuous Integration / Continuous Deployment) comes in. In this post, we’ll focus on applying CI/CD in Microsoft Fabric, covering how to set up your environment, manage development across branches, and collaborate effectively across teams.
This is Part 1 of a two-part series. Here, we’ll tackle workspace organization and collaboration. In Part 2, we’ll dive into deployment strategies between environments.
How Will We Produce Code in Microsoft Fabric?
In Fabric, development happens in two main ways:
- Fabric Items – Mainly developed using the Microsoft Fabric UI. You can also use VS Code, but to keep things simple, I’ll describe the process using the Fabric UI—VS Code isn’t quite there yet, though the general approach remains similar.
- Power BI Reports and Semantic Models – Mainly developed using Power BI Desktop.
Since these two areas are developed differently, we’ll need different collaboration and CI/CD processes for each. Let’s walk through how to organize this.
Organizing Your Microsoft Fabric Tenant
Planning CI/CD should start with your overall workspace architecture—essentially, what kind of items you’re creating in which environment. Here’s the approach I’ve established (feel free to adapt it to your needs):
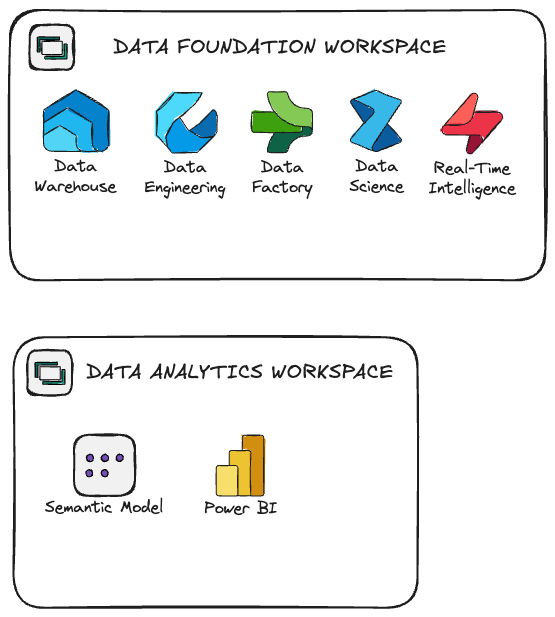
- Data Foundations Workspace – This is where all Fabric items (pipelines, notebooks, etc.) are stored.
- Data Analytics Workspace – This is where semantic models and Power BI reports are managed.
Separating these makes collaboration much easier. Use the Fabric UI for developing items in the Data Foundation workspace, and Power BI Desktop for work in the Data Analytics workspace.
You can think about separating semantic model from the reporias well due to the security reasons, but that’s the story for another post.
Configuring Your Workspaces
First things first—you’ll need to create a workspace, set up a Git or Azure Repo repository, and connect them. Here’s how:
Step 1: Create Your Workspace
Go to Microsoft Fabric and create a workspace for Data Foundation purposes:
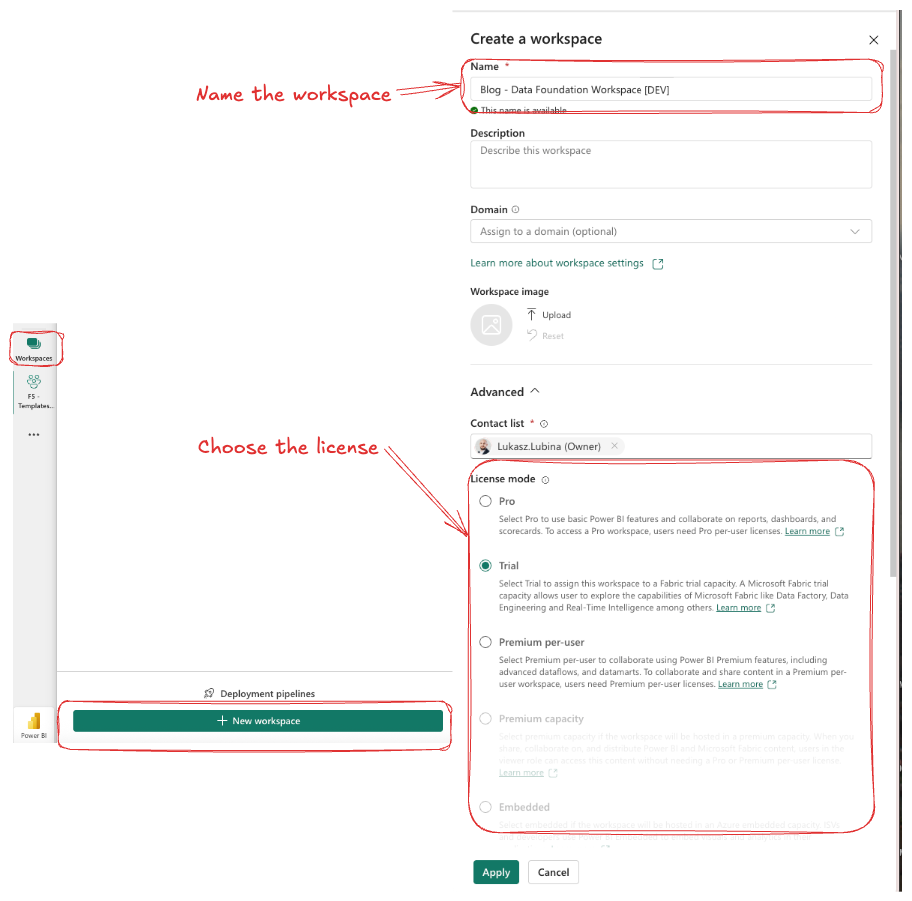
The highlighted configuration is required; the rest you can set up based on your needs. I use the following naming convention:
{Data Domain} – {Purpose} [{Environment}]
Step 2: Create Your Repository
Head over to Git or Azure Repos and create a repository (I’m using Azure Repos in my case):
In your project, go to Repos and create a new repository (or use an existing one):

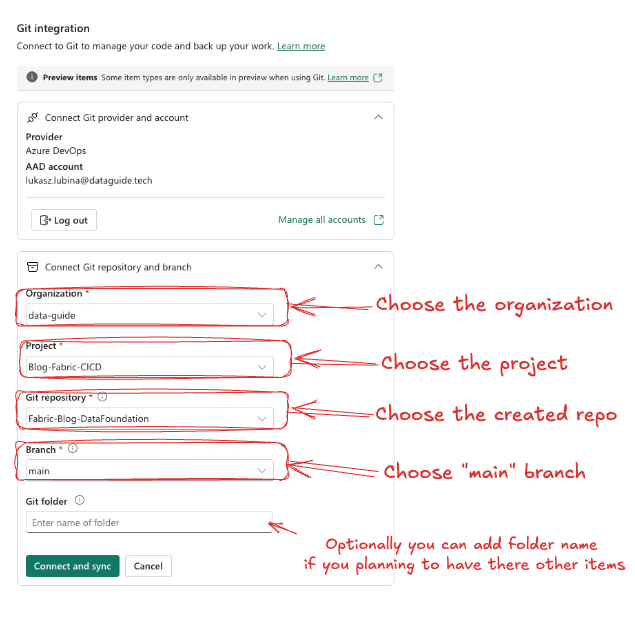
Step 3: Connect Repository to Your Workspace
Go to Fabric, open your workspace settings, and connect to Azure DevOps or Git:
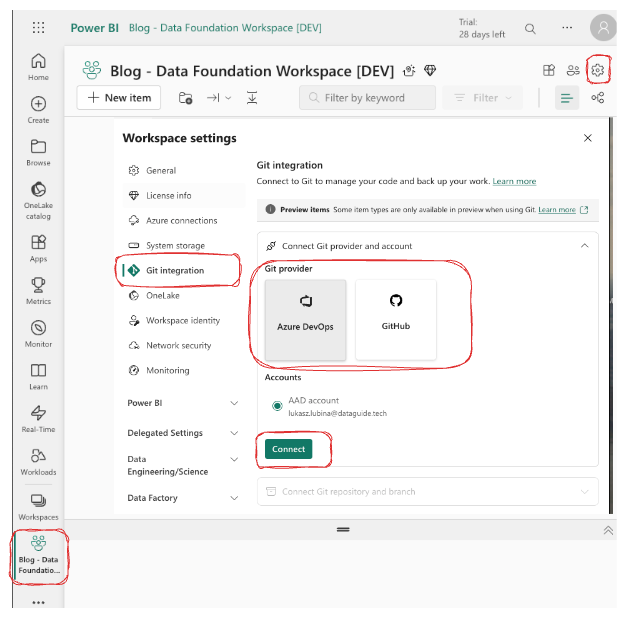
Provide your connection details:
The configuration for Data Analytics workspaces follows exactly the same steps—the only differences are the names and repositories you’ll use.
Collaboration on Data Foundation Workspaces
Here’s where things get interesting. Collaboration in Fabric works a bit differently than in standard development. Apart from branches, you’ll need to create a side workspace for development. You can’t just change the branch on your main workspace (e.g., Blog – Data Foundation Workspace [DEV]) since that would affect all users.
Thankfully, Microsoft has added this option to the UI:
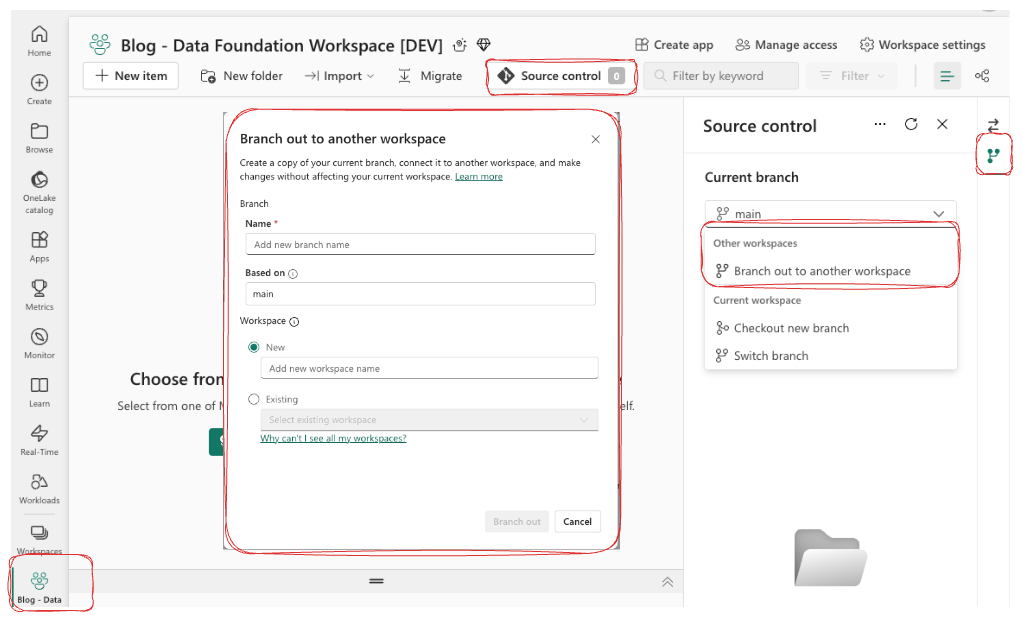
This lets you easily create a new branch and assign it to a new or existing workspace.
Two Approaches to Feature Branch Development
You have two options for working on feature branches:
- Create a new workspace for each development task – I don’t recommend this approach.
- Create a dedicated development workspace for each developer – This is my recommended approach.
Why not Option 1? Creating a new workspace per development tends to result in a large number of unused workspaces over time, especially when they aren’t cleaned up after the work is finished—which happens quite often. On top of that, there are security considerations since you’d need to grant every developer rights to create workspaces, which isn’t always ideal.
Why Option 2? With a separate development workspace for each developer, things stay organized. For example, if you have three developers—John, Joe, and Kate—your workspace list would look like this:
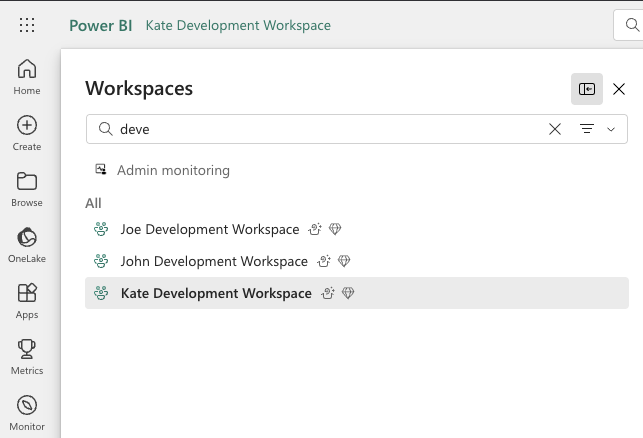
Heads up: All these workspaces must be linked to Fabric capacity.
Branching Out
When you attempt to create a new branch and link it to your existing development workspace, you might see this message:
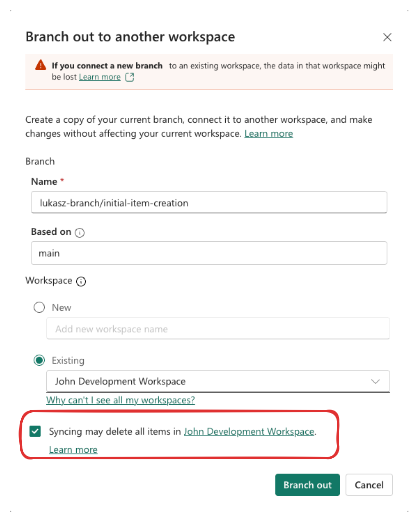
⚠️ Critical Warning: Before clicking “Branch out,” make sure everything from your previous development has been committed and is no longer needed—this action will completely replace your current items with those from the base branch. Also, keep in mind that the branch you’re branching from must contain at least one item (even a dummy commit created directly on the main branch will work).
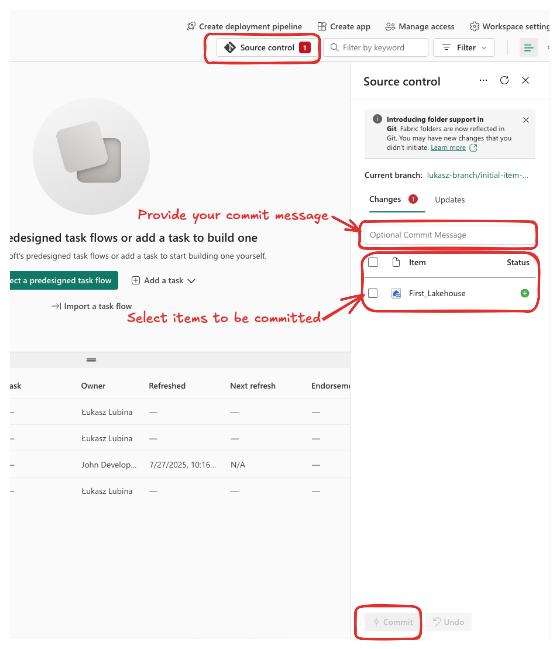
Committing Your Changes
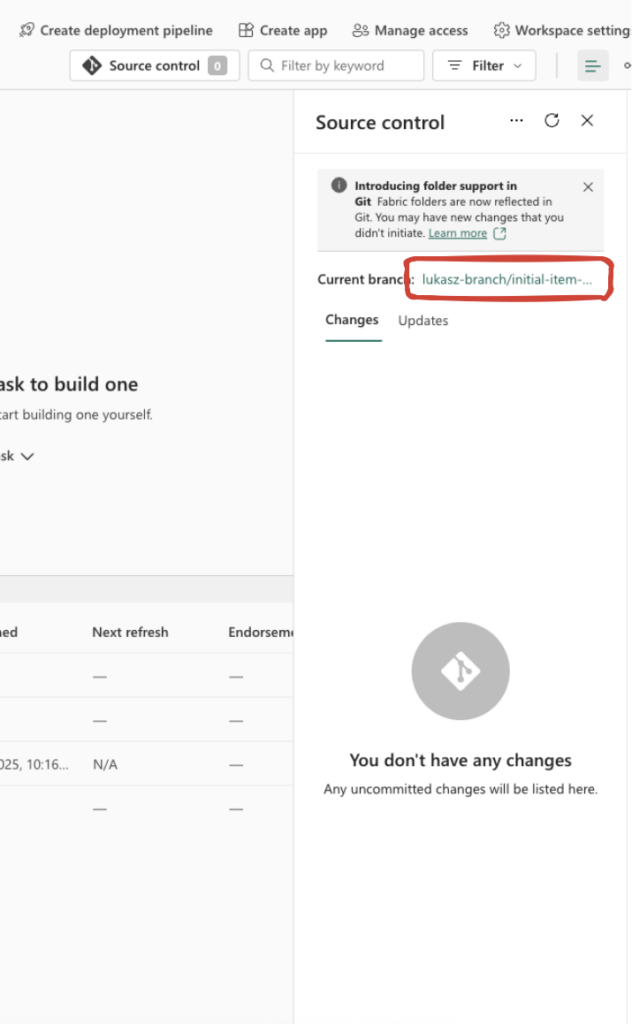
Once you’ve completed your development, commit your changes to the repository. Navigate to source control:
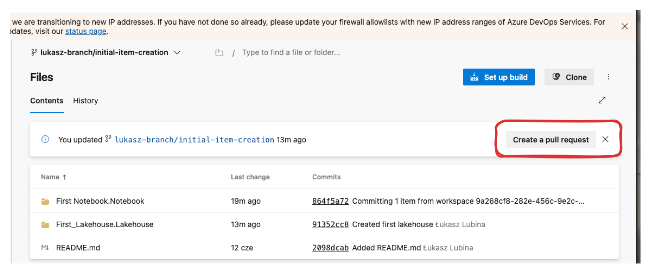
Creating a Pull Request
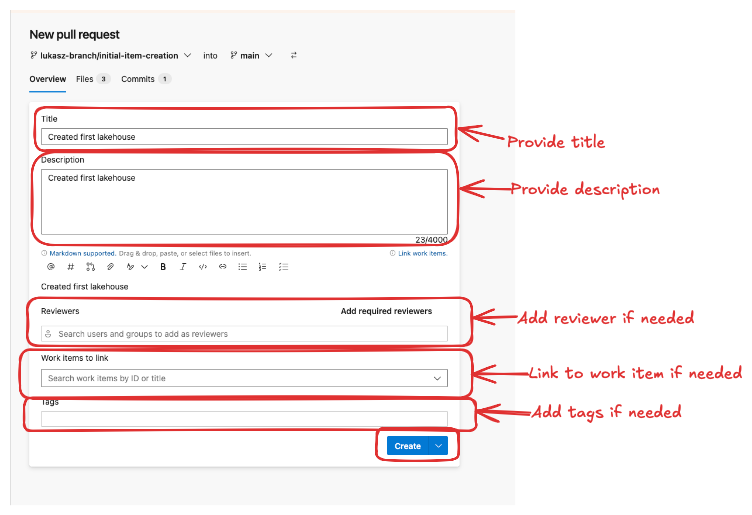
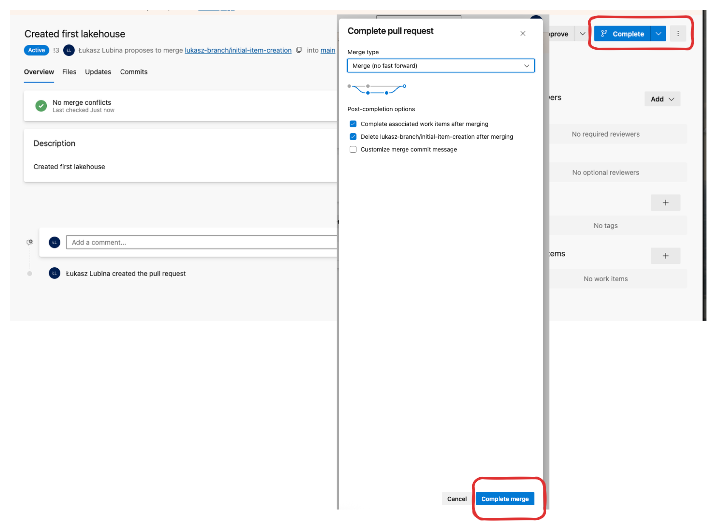
After committing, you’ll need to create a pull request and merge your changes to the main branch. Click on the URL shown:
Then follow these steps:
Syncing the Main Workspace
Once the merge is complete, return to your Main workspace and sync your changes. You’ll see a warning indicating pending changes from Git:
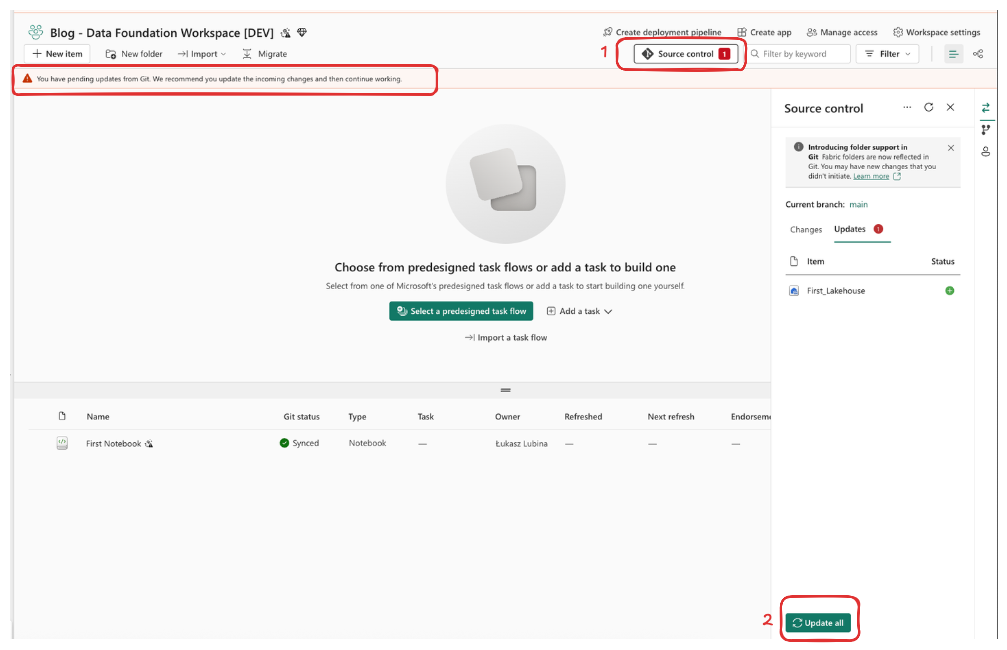
Click Update all and Fabric will sync all items from Git into your main workspace.
Collaboration on Data Analytics Workspaces
Collaboration for Data Analytics workspaces works a bit differently if you’re using Power BI Desktop.
ℹ️ Please note: If you’re not using Power BI Desktop—for example, you’re using Direct Lake semantic models and doing all Power BI dashboard development via the Fabric UI—follow the same steps described in “Collaboration on Data Foundation Workspaces” above.
For Power BI Desktop development, you’ll follow standard Git workflows. Here’s what you need to do (check out the official Microsoft documentation for detailed instructions):
- Install Git on your local machine.
- Clone the repository to a local folder on your computer.
- Create or update your Power BI reports or semantic models in that local folder.
- Commit your changes to the repository.
- Open a pull request in Azure DevOps (just like you would for changes in the Data Foundation workspace).
- Go back to the Microsoft Fabric workspace and sync it with the latest changes from the repository.
Wrapping Up
That’s it for Part 1! We’ve covered how to organize your workspaces, connect them to Git, and collaborate effectively in Microsoft Fabric—both for Data Foundation and Data Analytics scenarios.
Key Takeaway: A well-organized workspace structure with dedicated developer workspaces makes collaboration smoother and keeps your environments clean.
In Part 2, we’ll look at how to deploy your changes between environments. I’ll walk through two approaches:
- One using Deployment Pipelines (for environments with Power BI Premium)
- And one for non-Premium environments, using a custom deployment strategy that still ensures control and repeatability
Got questions or want to share how you’ve set up CI/CD in your Fabric environment? Drop a comment below—I’d love to hear about your experiences!
Happy building!